1.6 KiB
This is the firmware for the TNC3 version 2.1.1 hardware.
Building
Use Eclipse with CDT and the GNU MCU Eclipse plugins.
Debugging
Logging is enabled in debug builds and is output via ITM (SWO). The
firmware is distributed with an openocd stlink config file that enables
ITM output to a named pipe -- swv. You must create this pipe in the
top level directory.
To read from this pipe, open a terminal and run:
while true; do tr -d '\01' < swv; done
If you change the MCU's core clock, you need to adjust the timing in the
stlink-tnc3.cfg config file.
Installing firmware
Firmware can be installed via the on-board ST/LINK port or via USB DFU.
USB DFU
-
Download the STM32CubeProgrammer. https://s3.amazonaws.com/mobilinkd/en.stm32cubeprog-1.4.0.zip This programmer will work on Linux, OS X, and Windows.
-
Download the ELF file from the release (or that you have built from source).
-
Plug the TNC into a USB port and turn the TNC on. You should see a USB serial port enumerated.
-
Put the TNC into DFU mode by pressing the DFU button on the side. The TNC will only enter DFU mode when plugged into a USB port.
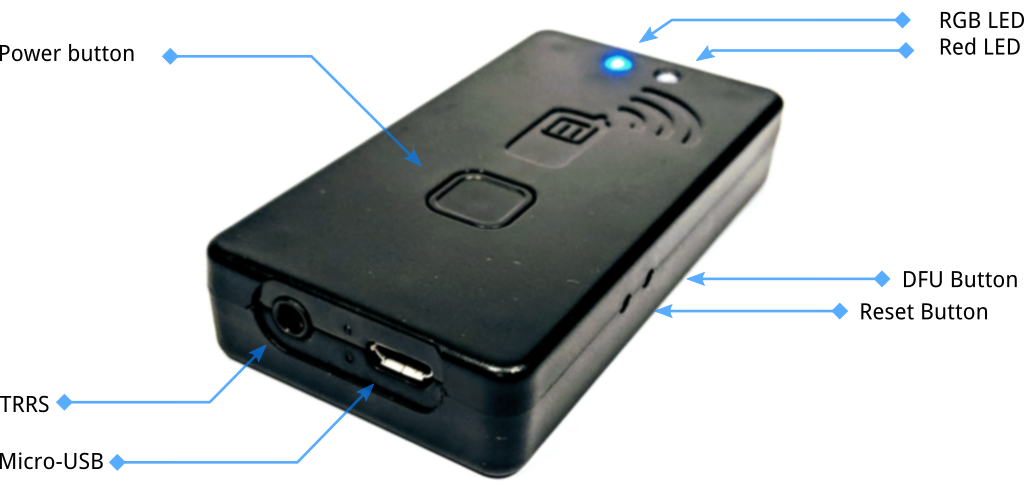
There is no visible indication on the TNC that it is in DFU mode
-
You should see the serial port device go away and a new DFU device appear.
-
Run the STM32CubeProgrammer from the command-line. (Replace "firmware.elf" with the appropriate firmware filename.)
./STM32_Programmer_CLI -c port=USB1 -d firmware.elf -v -g 0x8000000
-
When that is complete, the DFU device will disappear and the serial port device will re-appear.