Brief introduction
SDRangel uses sample source plugins to collect I/Q samples from a hardware device. Then in the passband returned possibly decimated one or more channel Rx plugins can be used to demodulate, decode or analyze some part of this spectrum.
Conversely SDRangel uses sample sink plugins to send I/Q samples to a hardware device. One or more channel Tx plugins can be used to produce modulated samples that are mixed into a transmission passband with possible subsequent interpolation before being sent to the device or written to file.
You can check out the discussion group
The Main Window interface is described here
Doing the first steps with this program is presented in paragraph "Running the program" but before jumping in make sure you check all the paragraphs below.
Getting the program
Compiling from source
This is one of the recommended ways. Instructions assume the operating system is Linux with a Ubuntu 18.04 distribution. Detailed instructions can be found here.
Building a Docker image
This is the other recommended way and applies to a Linux system with Docker installed. The Docker files and help scripts are found in the sdrangel-docker ancillary project more specifically in the sdrangel folder. This saves you the hassle to build manually from source and as images are regularly built with the Dockerfile it follows the most up to date recipe.
Installing a binary distribution
This applies when neither of the two previous possibilities apply. Although it is possible to build an installer for Windows on your own system most Windows users will rather use the distributed installer. For each release from the master branch the CI/CD system will ship two archives for the corresponding release in the releases section.
Installer for Windows 10
The binary is built with the Actions CI/CD pipeline using MSVC 2019 and thus applies in this context and is meant to run on Windows 10. This does not apply to any other flavor of Windows.
The archive contains a self extracting installer sdrangel-<version>-win64.exe that you invoke by double clicking on it. You have to follow the different menus to install the program in a default location or a different location of your choice.
Archive for Linux Ubuntu 20.04
The binary is built at CI/CD premises on a Linux Ubuntu 20.04 VM using gcc and thus applies in this context. This does not apply to any other Linux distribution including other releases of Ubuntu.
The archive is a tar gzipped archive sdrangel-<run>-master.tar.gz of a sdrangel-<run>-master directory where the following files can be found:
- sdrangel_<version>-amd64.deb is a Debian package that can be installed with sudo apt-get install sdrangel_<version>-amd64.deb command. Occasionnally after this command you may have to force the installation of dependencies with the sudo apt-get -f install command.
- sdrangel_<version>-amd64.changes is a formatted text file with the changelog and other pieces of information related to the release. You may find a MD5 checksum of the files contained in the release.
- sdrangel_<version>-amd64.buildinfo is a list of all dependencies and environment variables used during the build
- sdrangel_<version>-amd64.build is the complete log of the build
Note that for some releases a sdrangel-<run>-dev.tar.gz archive is produced instead but since it is at a point where dev and master branches join it is the exact same thing as master
Snap, Flatpak and the like
Not supported.
Other distributions (OpenSuSE, Arch...)
Not supported directly. Please contact the maintainer of these packages.
Before you run
Prerequisite for Windows distribution
If you do not have the Visual C++ runtime already installed you will have to install the Visual C++ runtime environment vc_redist.x64.exe from Microsoft.
Linux udev rules
Your hardware will not be accessible if the udev rules are not set. It may or may not be the case depending on the interaction with other programs installation procedures. In any case you may want to check this repository where rules for all hardware known to SDRangel are stored.
Invoke the program
Linux
Compiled from source
When compiled from source as per instructions above type this command in a terminal: /opt/install/sdrangel/bin/sdrangel
Running in a Docker container
For details you can follow instructions in the sdrangel-docker project. To summarize:
- Standalone: use the
run.shscript in sdrangel-docker/sdrangel - In a compose stack: use the
run.shscript in sdrangel-docker/compose
Running from binary distribution
An icon should appear in the menu. The binary is in /usr/bin so it can also run as sdrangel command in a terminal. Most importantly if you run in a terminal you have to allow access to the libraries that are not in the standard path by typing export LD_LIBRARY_PATH=/usr/lib/sdrangel before running the sdrangel command
Windows
Assuming you have installed the software with the distributed installer an icon should appear in the recently installed applications. You can then move this icon to a convenient place for you. The program is invoked by clicking on the icon.
It is also possible to invoke sdrangel.exe from the command line in the directory where it has been installed or prefixed with the path where it has been installed.
Running the program
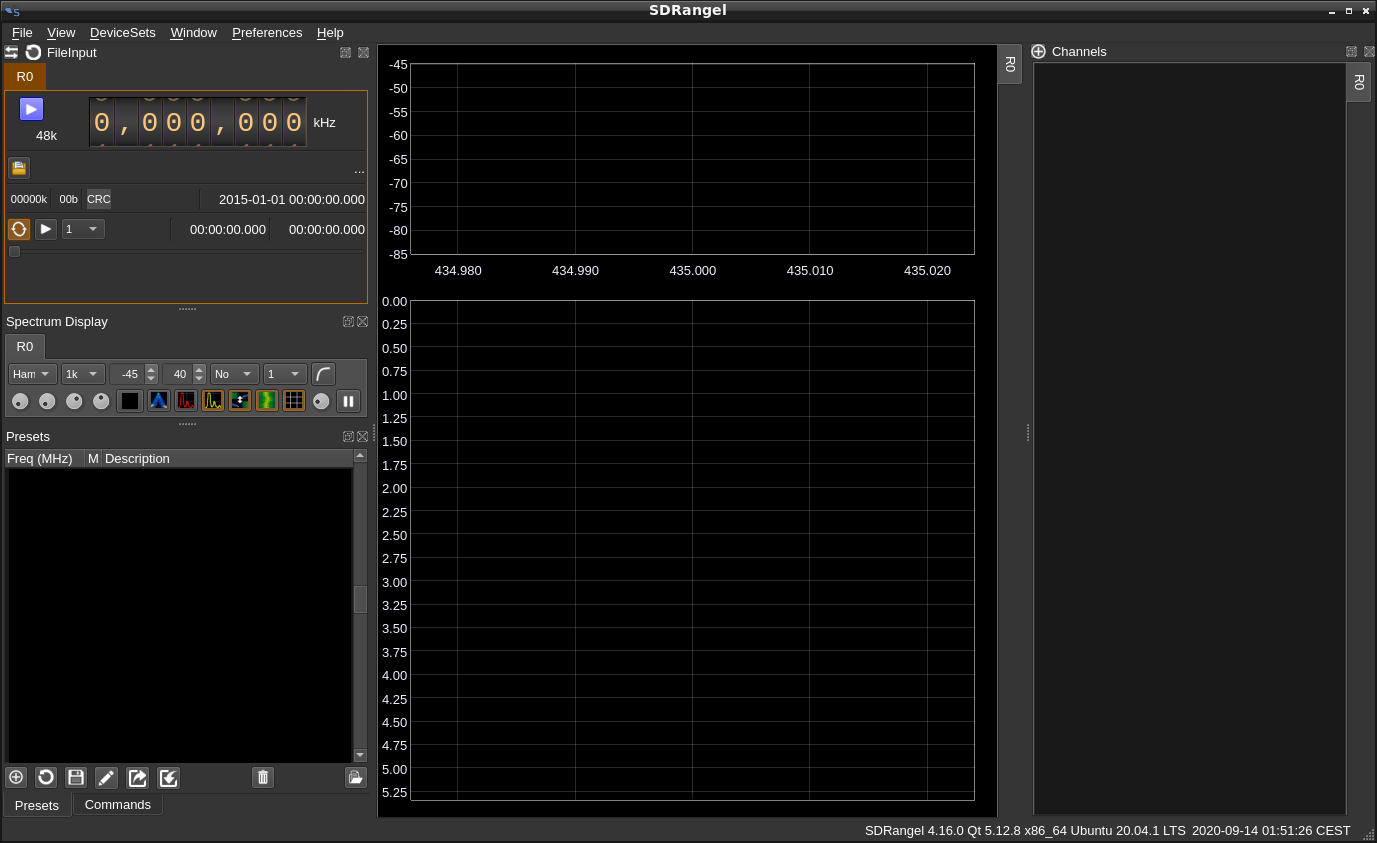
You will start with a default "File source" device as the first receiver and no baseband channels. The main window will look like this:
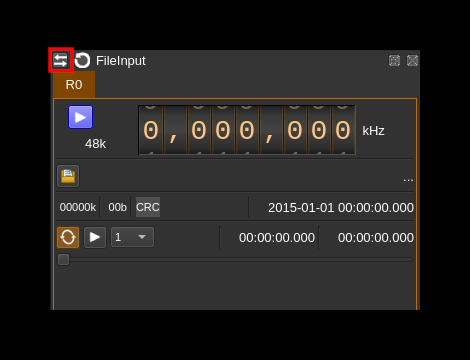
To actually start streaming I/Q samples from a device and add baseband channels to hear or see demodulated signals you need to change the device with the change device icon in the top bar of the device panel:
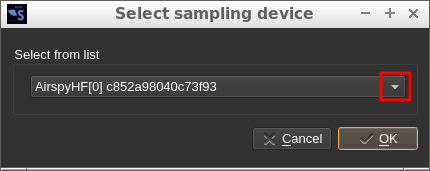
This opens a dialog to let you choose the new device
Click near the combo box arrow to open the list of available devices:
If you have a supported device attached and the plugins were loaded correctly the one you re looking for should appear on the list. Let's take an example with RTL-SDR:
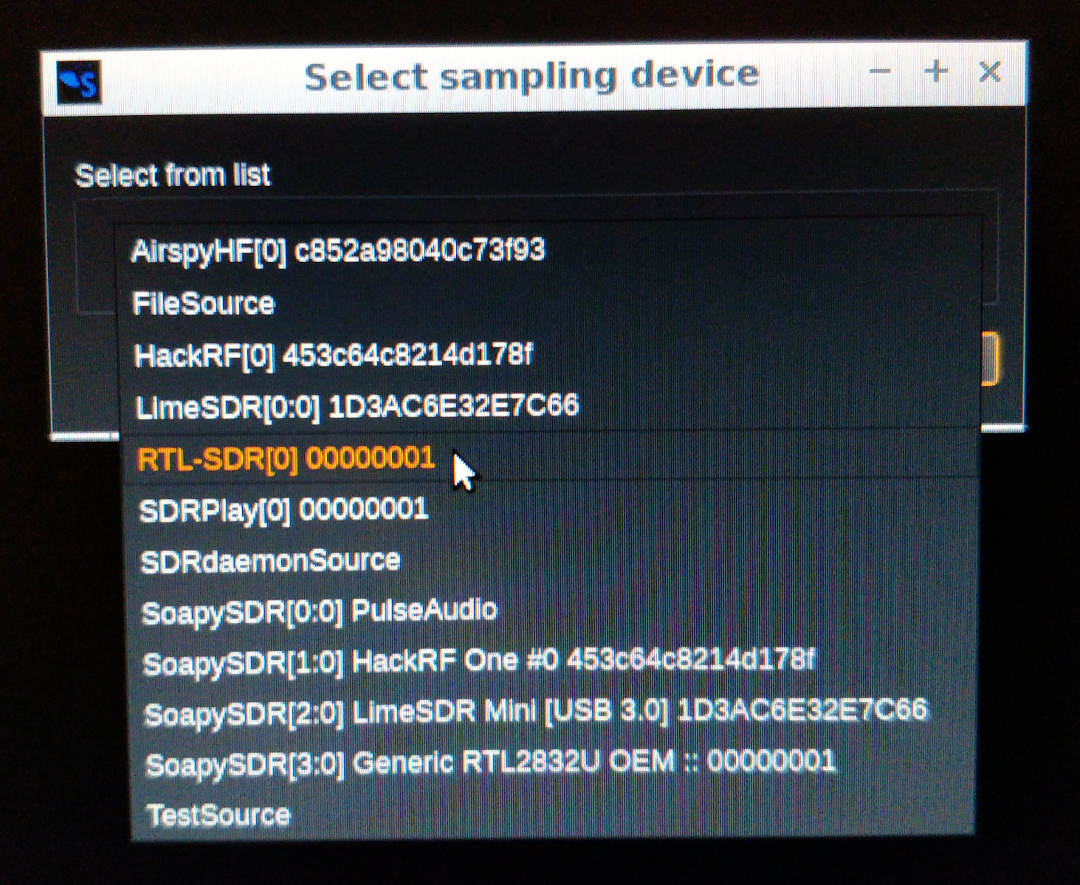
Select it from the list and then click "OK" in the dialog.
Then you will need to add a baseband channel. Move on to the channels panel and click on the circled plus icon:
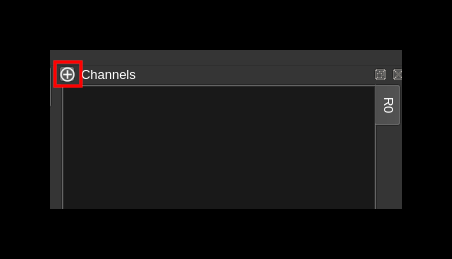
This opens a dialog to let you choose the channel type to add.
Let's suppose you want to demodulate narrow band FM (NFM). You select the "NFM demodulator" from the combo list and press the Apply button to add the channel to the passband.
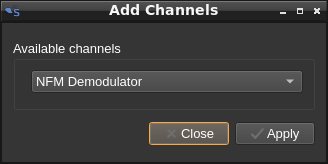
You may add more channels of any kind by selecting the channel tyoe and press the Apply button again. Thus you can listenin to multiple channels simultaneously with possible different modulation schemes.
When you are done you can close the dialog with the Close button.
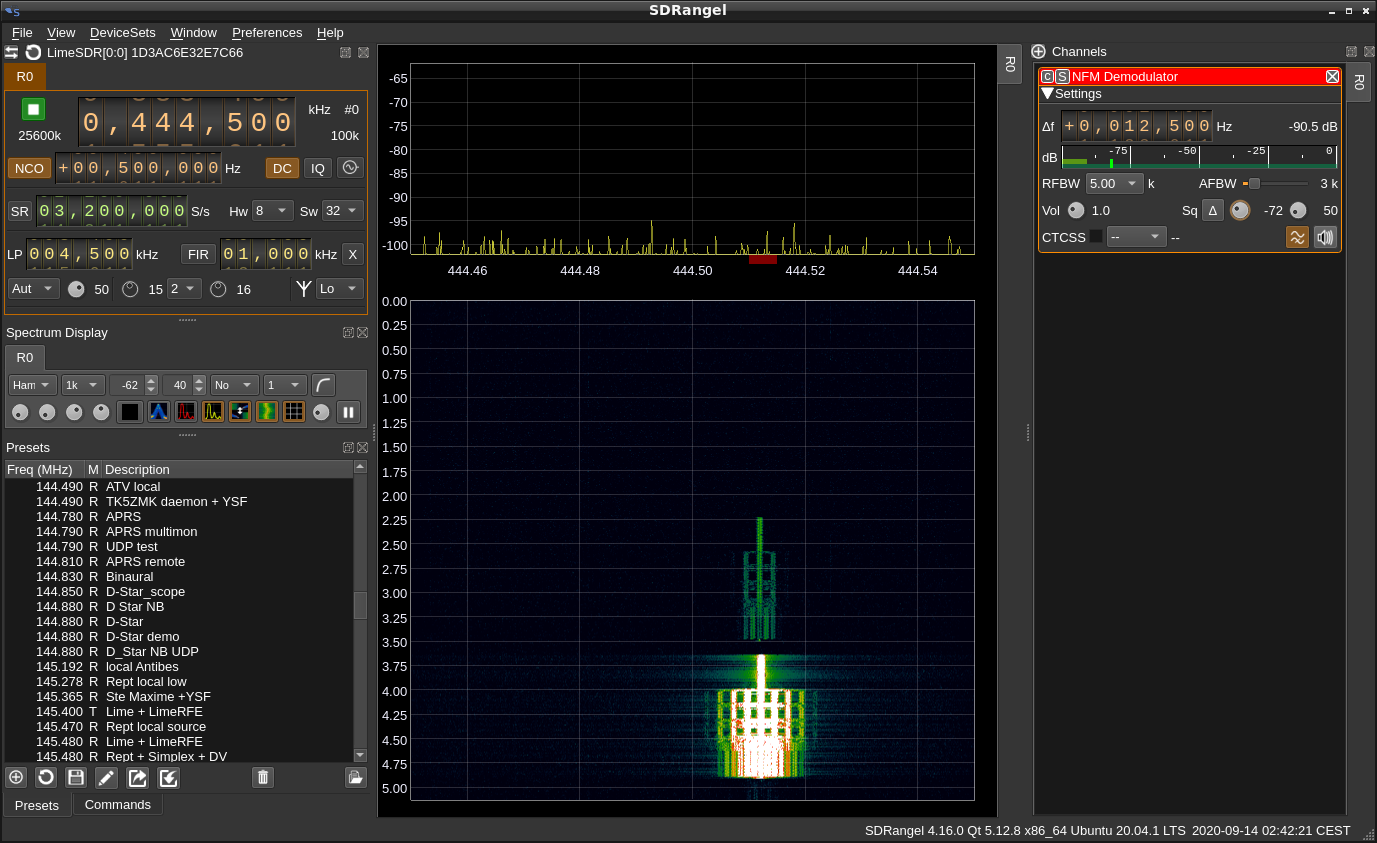
The main window should now look like this:

- The center frequency of the passband can be controlled from the main dial of the device interface display (1)
- The offset frequency (delta) of the channel center within the passband can be set with the channel dial (2)
- To start streaming you have to press the "play" button (3). The same button can be used to stop streaming later. It is recommended to stop streaming before changing device.
After some tuning you can eventually see something like this:
This is a very brief introduction on how to get you started quickly. Please read the other pages of the Wiki in particular to get the details of device and channel plugins.