Brief introduction
SDRangel uses sample source plugins to collect I/Q samples from a hardware device. Then in the passband returned possibly decimated one or more channel Rx plugins can be used to demodulate, decode or analyze some part of this spectrum.
Conversely SDRangel uses sample sink plugins to send I/Q samples to a hardware device. One or more channel Tx plugins can be used to produce modulated samples that are mixed into a transmission passband with possible subsequent interpolation before being sent to the device.
The UI is organized in workspaces inside which you place the different components UIs: device, main spectrum, channels, features. These UIs can be resized and moved freely to let you compose the global UI at your convenience. You can have multiple workspaces and move components across workspaces. By default workspaces are stacked upon each other and can be switched using the side tabs to bring up the selected workspace on the top of the display. Workspaces are placed in a docking area and therefore can be docked out to be moved to another screen in a multiple screen setup for example.
You can check out the discussion group or forum
The Main Window interface is described here
Doing the first steps with this program is presented in paragraph "Running the program" but before jumping in make sure you check all the paragraphs below.
Getting the program
Compiling from source
This is one of the recommended ways. Detailed instructions can be found for Ubuntu Linux, Windows and Mac.
Building a Docker image
This is the other recommended way and applies to a Linux system with Docker installed. The Docker files and help scripts are found in the sdrangel-docker ancillary project more specifically in the sdrangel folder. This saves you the hassle to build manually from source and as images are regularly built with the Dockerfile it follows the most up to date recipe.
Installing a binary distribution
This applies when neither of the two previous possibilities apply. Although it is possible to build an installer for Windows on your own system most Windows users will rather use the distributed installer. For each release from the master branch the CI/CD system will ship two archives for the corresponding release in the releases section.
Installer for Windows 10 & 11
The binary is built with the Actions CI/CD pipeline using MSVC 2022 and thus applies in this context and is meant to run on Windows 10 or 11. This does not apply to any other flavor of Windows.
The archive contains a self extracting installer sdrangel-<version>-win64.exe that you invoke by double clicking on it. You have to follow the different menus to install the program in a default location or a different location of your choice.
Archive for Linux Ubuntu 22.04
The binary is built in a Ubuntu 22.04 based Docker image using gcc and thus applies in this context. This does not apply to any other Linux distributions including other releases of Ubuntu.
The archive is a tar gzipped archive sdrangel-<run>-master.tar.gz of a sdrangel-<run>-master directory where the following files can be found:
- sdrangel_<version>-amd64.deb is a Debian package that can be installed with sudo apt-get install sdrangel_<version>-amd64.deb command. Occasionnally after this command you may have to force the installation of dependencies with the sudo apt-get -f install command.
- sdrangel_<version>-amd64.changes is a formatted text file with the changelog and other pieces of information related to the release. You may find a MD5 checksum of the files contained in the release.
- sdrangel_<version>-amd64.buildinfo is a list of all dependencies and environment variables used during the build
- sdrangel_<version>-amd64.build is the complete log of the build
Note that for some releases a sdrangel-<run>-dev.tar.gz archive is produced instead but since it is at a point where dev and master branches join it is the exact same thing as master
Snap
The Snap Store contains a binary that can run on a variety of Linux distributions with Snap installed, including Ubuntu, Arch, Fedora, openSUSE, Debian, CentOS and RHEL.

In order to use USB SDRs or record audio, permissions need to be granted either under Settings > Apps > SDRangel (check "Access USB hardware directly" and "Record Audio"), or from a terminal, by running:
sudo snap connect sdrangel:raw-usb
sudo snap connect sdrangel:audio-record
SDRs not currently supported in the snap include SDRplay, Perseus and XTRX.
Snap's sandboxing can potentially interfere with some of SDRangel's functionality. If you see any problems, please try enabling additional relevant permissions. If that doesn't help, open an issue.
Flatpak
An SDRangel flatpak that can run on a variety of Linux distributions can be installed with: flatpak install flathub org.sdrangel.SDRangel and then run with flatpak run org.sdrangel.SDRangel
Flatpak specific issues should be reported here
SDRs not currently supported in the flatpak include BladeRF and SDRplay via v3 API.
Fedora
Install from the command line, with: dnf install sdrangel
Note that the following plugins are not yet included: Satellite Tracker, DAB Demod, APT Demod, DSD Demod.
Other distributions (OpenSuSE, Arch...)
Not supported directly. Please contact the maintainer of these packages.
Mac O/S
For most releases you will find a .dmg file. After downloading, click the .dmg file, then drag the SDRangel icon in to Applications.
For the arm64 build, MacOS Ventura 13.6.1 or newer is required.
Android
Install from Play Store
Before you run
Prerequisite for Windows distribution
If you do not have the Visual C++ runtime already installed you will have to install the Visual C++ runtime environment vc_redist.x64.exe from Microsoft.
Linux udev rules
Your hardware will not be accessible if the udev rules are not set. It may or may not be the case depending on the interaction with other programs installation procedures. In any case you may want to check this repository where rules for all hardware known to SDRangel are stored.
Invoke the program
Linux
Compiled from source
When compiled from source as per instructions above type this command in a terminal: /opt/install/sdrangel/bin/sdrangel
Running in a Docker container
For details you can follow instructions in the sdrangel-docker project. To summarize:
- Standalone: use the
run.shscript in sdrangel-docker/sdrangel - In a compose stack: use the
run.shscript in sdrangel-docker/compose
Running from binary distribution
An icon should appear in the menu. The binary is in /usr/bin so it can also run as sdrangel command in a terminal. Most importantly if you run in a terminal you have to allow access to the libraries that are not in the standard path by typing export LD_LIBRARY_PATH=/usr/lib/sdrangel before running the sdrangel command
Windows
Assuming you have installed the software with the distributed installer an icon should appear in the recently installed applications. You can then move this icon to a convenient place for you. The program is invoked by clicking on the icon.
It is also possible to invoke sdrangel.exe from the command line in the directory where it has been installed or prefixed with the path where it has been installed.
Mac
Use Finder and browse to Applications. The first time you run SDRangel, you must hold the Control key and click the SDRangel icon and select Open from the menu, then press the Open button in the dialog that asks if you are sure you want to open it. Subsequentially, you can just double-click the SDRangel icon.
Running the program
You will start with an empty workspace like this:
If the toolbar is not visible, you can create a workspace by clicking on Workspaces then New.
You may want to right-click the Stack button on the toolbar so that sub-windows will be placed and sized automatically in a layout similar to earlier versions of SDRangel. You can trigger auto placement anytime by left clicking the Stack button. The rest of the document assumes a freehand layout (Stack unchecked).
Create a receiver by clicking on the receiving antenna icon:

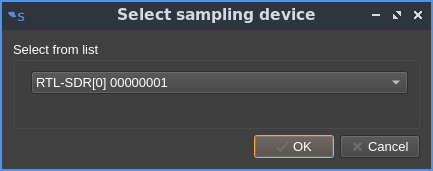
Choose a receiving device...
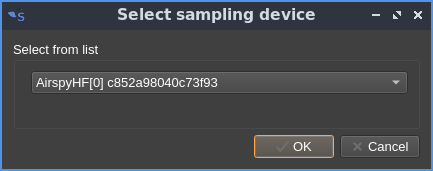
Open the drop down list or flip through with the mouse wheel and select RTL-SDR for example:
Click OK and the receiver UI and its corresponding main spectrum is added to the workspace
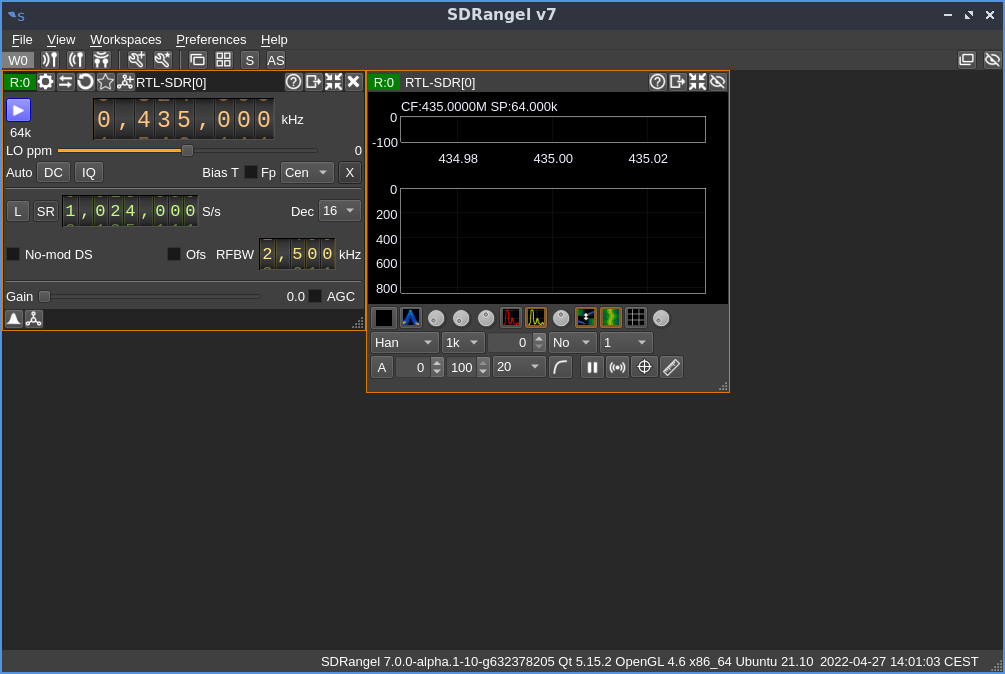
You can move the windows with drag/drop seizing the top left index display, title on the top or the status, absolute frequency (or empty) display at the bottom:
Spectrum, channel and feature windows have the same resize and move options
To reduce the size to its minimum (shrink window) click on the "shrink" icon:

More controls and menus are available that will not be detailed in this quick start. For more details please check
- Device window controls
- Main spectrum window controls
- Channel window controls
- Feature window controls
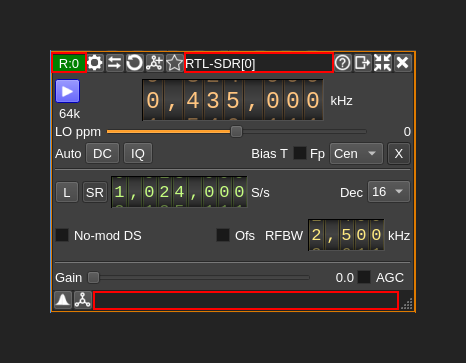
Now you will add a channel to the receiver that will process samples in the bandwidth of the receiver that depends on device sample rate and decimation. In our example the bandwidth is 64 kHz and is displayed below the start button of the device window:

Click on the add channel icon of the device window at the top:

This opens the dialog where you can select which channel(s) to add. You can add more than one channel from this dialog by clicking Apply after each (or same) selection. In this example we will select "NFM Demodulator" (Narrowband FM demoddulator) from the drpop down list:
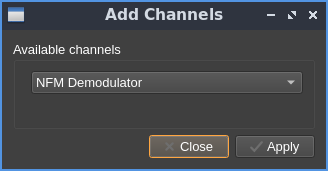
Click on Apply then Close if you are done adding channels as in this example and a NFM demodulator window appears on the workspace in the next empty space. Note that you can move the channel window around as described previously to place it anywhere at your liking.
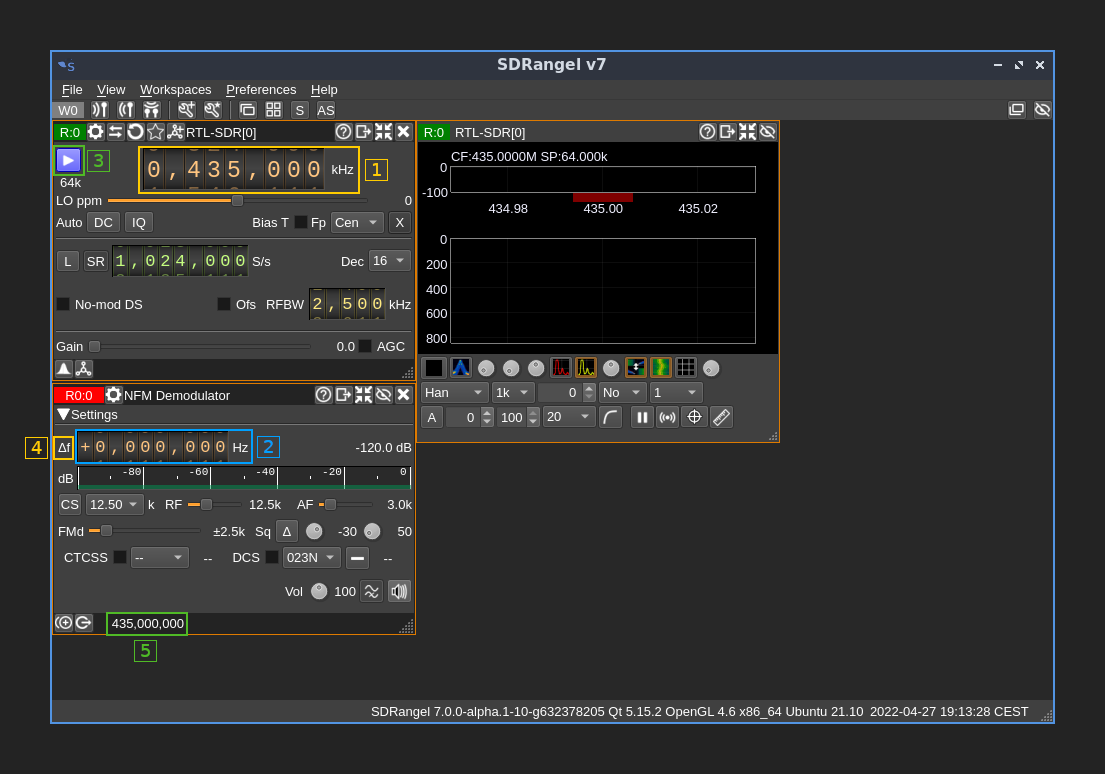
- The center frequency of the passband can be controlled from the main dial of the device interface display (1)
- The offset frequency (delta) of the channel center within the passband can be set with the channel dial (2) Note that this is limited to the range of the bandwidth. By moving the mouse over the Δf label (4) a tooltip reminding of the available range appears. The absolute channel center frequency is displayed in the left corner of the bottom bar of the channel window (5)
- You can start the receiver by clicking on the "start" button in the device window (3)
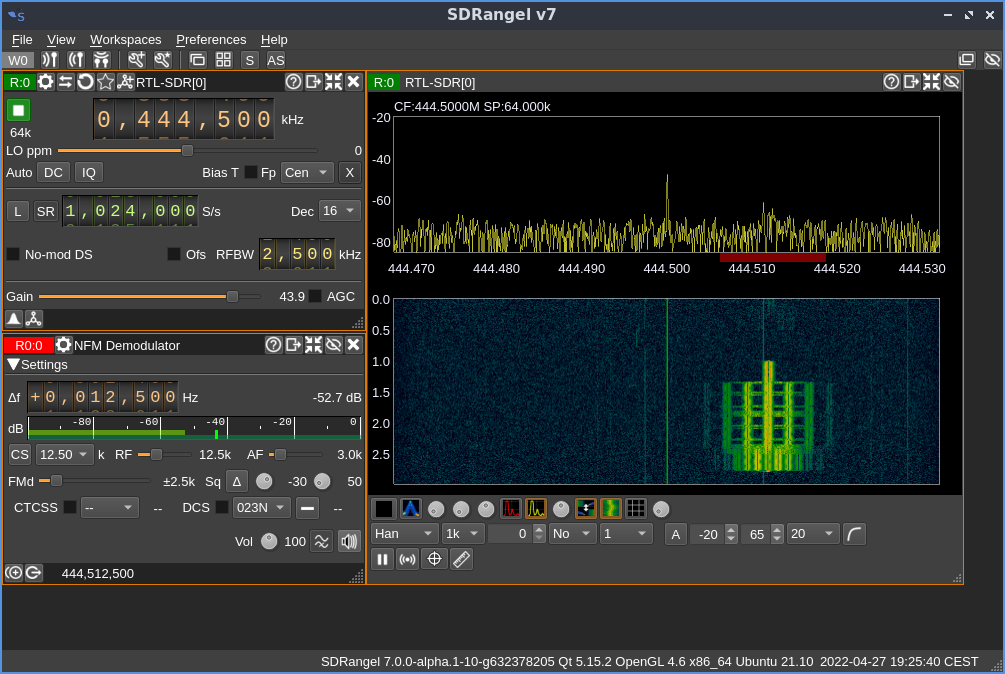
After some tuning you can eventually see something like this and hear some sound:
Note that your setup will be saved and restored across program stop/start cycles as the default configuration. If you want to restart from scratch you have to specify the --scratch option on the command line. You can also save different configurations by opening a dialog from the Preferences / Configuration menu.
This is a very brief introduction on how to get you started quickly. Please read the other pages of the Wiki in particular to get the details of device and channel plugins.
You can also create transmitters and MIMO (Multiple-Input Multiple-Output) devices with the following buttons in the top bar of the workspace window:
- Transmitters:

- MIMO:
