7.2 KiB
HTTP Restful API Server Example
(See the README.md file in the upper level 'examples' directory for more information about examples.)
Overview
This example mainly introduces how to implement a RESTful API server and HTTP server on ESP32, with a frontend browser UI.
This example designs several APIs to fetch resources as follows:
| API | Method | Resource Example | Description | Page URL |
|---|---|---|---|---|
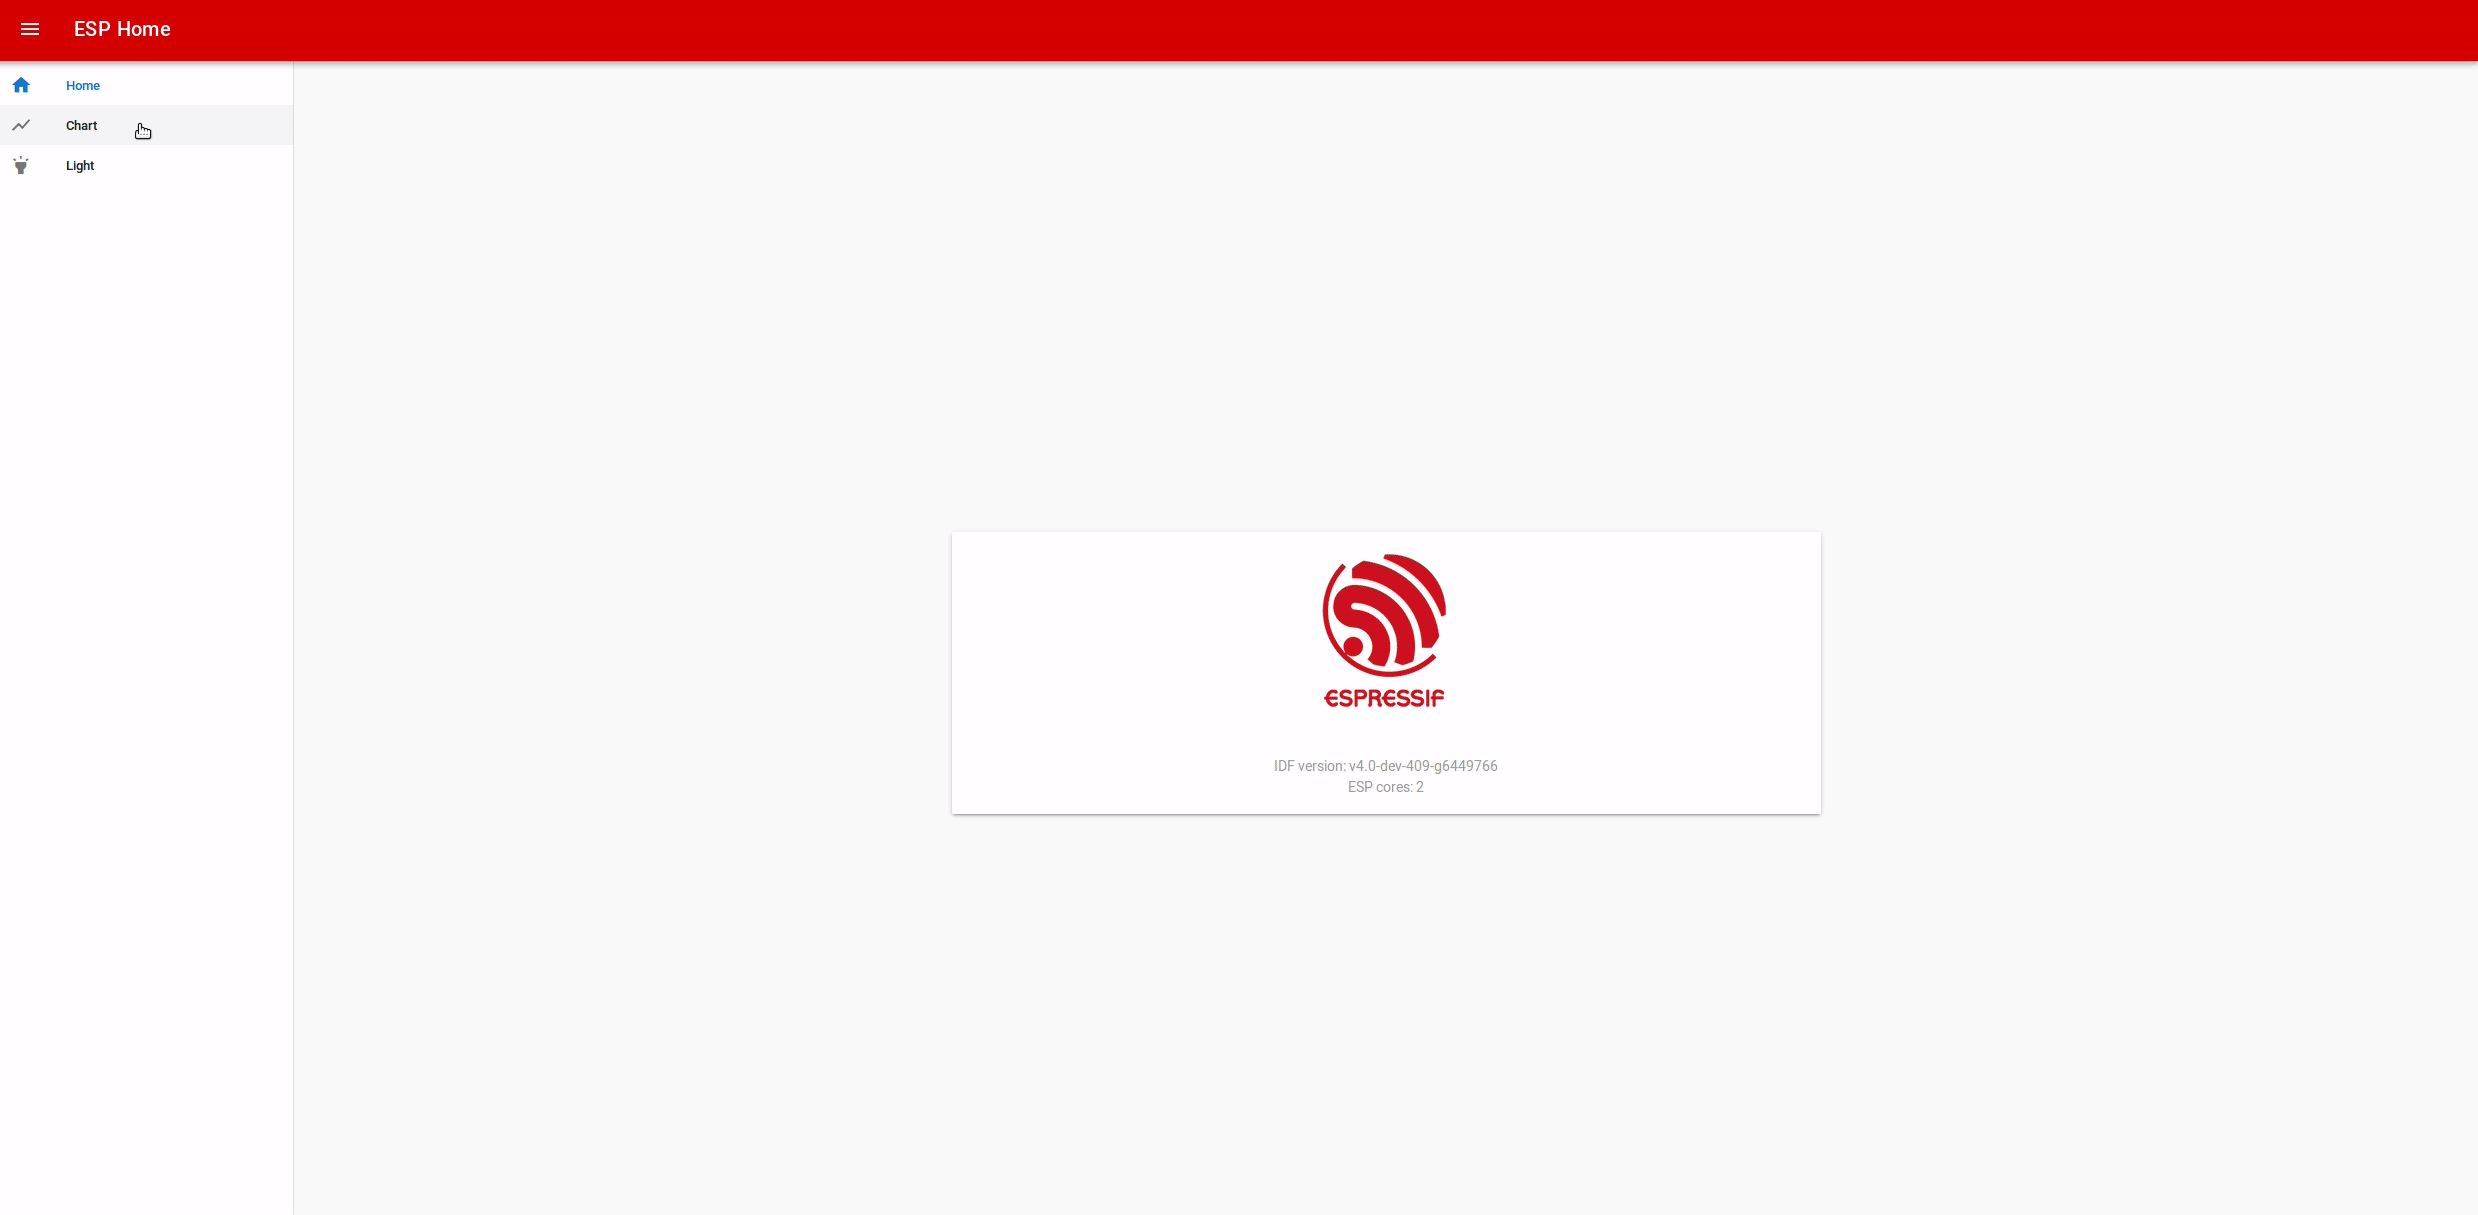
/api/v1/system/info |
GET |
{ version:"v4.0-dev", cores:2 } |
Used for clients to get system information like IDF version, ESP32 cores, etc | / |
/api/v1/temp/raw |
GET |
{ raw:22 } |
Used for clients to get raw temperature data read from sensor | /chart |
/api/v1/light/brightness |
POST |
{ red:160, green:160, blue:160 } |
Used for clients to upload control values to ESP32 in order to control LED’s brightness | /light |
Page URL is the URL of the webpage which will send a request to the API.
About mDNS
The IP address of an IoT device may vary from time to time, so it’s impracticable to hard code the IP address in the webpage. In this example, we use the mDNS to parse the domain name esp-home.local, so that we can alway get access to the web server by this URL no matter what the real IP address behind it. See here for more information about mDNS.
Notes: mDNS is installed by default on most operating systems or is available as separate package.
About deploy mode
In development mode, it would be awful to flash the whole webpages every time we update the html, js or css files. So it is highly recommended to deploy the webpage to host PC via semihost technology. Whenever the browser fetch the webpage, ESP32 can forward the required files located on host PC. By this mean, it will save a lot of time when designing new pages.
After developing, the pages should be deployed to one of the following destinations:
- SPI Flash - which is recommended when the website after built is small (e.g. less than 2MB).
- SD Card - which would be an option when the website after built is very large that the SPI Flash have not enough space to hold (e.g. larger than 2MB).
About frontend framework
Many famous frontend frameworks (e.g. Vue, React, Angular) can be used in this example. Here we just take Vue as example and adopt the vuetify as the UI library.
How to use example
Hardware Required
To run this example, you need an ESP32 dev board (e.g. ESP32-WROVER Kit, ESP32-Ethernet-Kit) or ESP32 core board (e.g. ESP32-DevKitC). An extra JTAG adapter might also needed if you choose to deploy the website by semihosting. For more information about supported JTAG adapter, please refer to select JTAG adapter. Or if you choose to deploy the website to SD card, an extra SD slot board is needed.
Pin Assignment:
Only if you deploy the website to SD card, then the following pin connection is used in this example.
| ESP32 | SD Card |
|---|---|
| GPIO2 | D0 |
| GPIO4 | D1 |
| GPIO12 | D2 |
| GPIO13 | D3 |
| GPIO14 | CLK |
| GPIO15 | CMD |
Configure the project
Open the project configuration menu (idf.py menuconfig).
In the Example Connection Configuration menu:
- Choose the network interface in
Connect usingoption based on your board. Currently we support both Wi-Fi and Ethernet. - If you select the Wi-Fi interface, you also have to set:
- Wi-Fi SSID and Wi-Fi password that your esp32 will connect to.
- If you select the Ethernet interface, you also have to set:
- PHY model in
Ethernet PHYoption, e.g. IP101. - PHY address in
PHY Addressoption, which should be determined by your board schematic. - EMAC Clock mode, GPIO used by SMI.
- PHY model in
In the Example Configuration menu:
- Set the domain name in
mDNS Host Nameoption. - Choose the deploy mode in
Website deploy mode, currently we support deploy website to host PC, SD card and SPI Nor flash.- If we choose to
Deploy website to host (JTAG is needed), then we also need to specify the full path of the website inHost path to mount (e.g. absolute path to web dist directory).
- If we choose to
- Set the mount point of the website in
Website mount point in VFSoption, the default value is/www.
Build and Flash
After the webpage design work has been finished, you should compile them by running following commands:
cd path_to_this_example/front/web-demo
npm install
npm run build
After a while, you will see a dist directory which contains all the website files (e.g. html, js, css, images).
Run idf.py -p PORT flash monitor to build and flash the project..
(To exit the serial monitor, type Ctrl-].)
See the Getting Started Guide for full steps to configure and use ESP-IDF to build projects.
Extra steps to do for deploying website by semihost
We need to run the latest version of OpenOCD which should support semihost feature when we test this deploy mode:
openocd-esp32/bin/openocd -s openocd-esp32/share/openocd/scripts -f interface/ftdi/esp32_devkitj_v1.cfg -f board/esp-wroom-32.cfg
Example Output
Render webpage in browser
In your browser, enter the URL where the website located (e.g. http://esp-home.local). You can also enter the IP address that ESP32 obtained if your operating system currently don't have support for mDNS service.
ESP monitor output
In the Light page, after we set up the light color and click on the check button, the browser will send a post request to ESP32, and in the console, we just print the color value.
I (6115) example_connect: Connected to Ethernet
I (6115) example_connect: IPv4 address: 192.168.2.151
I (6325) esp-home: Partition size: total: 1920401, used: 1587575
I (6325) esp-rest: Starting HTTP Server
I (128305) esp-rest: File sending complete
I (128565) esp-rest: File sending complete
I (128855) esp-rest: File sending complete
I (129525) esp-rest: File sending complete
I (129855) esp-rest: File sending complete
I (137485) esp-rest: Light control: red = 50, green = 85, blue = 28
Troubleshooting
- Error occurred when building example:
...front/web-demo/dist doesn't exit. Please run 'npm run build' in ...front/web-demo.- When you choose to deploy website to SPI flash, make sure the
distdirectory has been generated before you building this example.
- When you choose to deploy website to SPI flash, make sure the
(For any technical queries, please open an issue on GitHub. We will get back to you as soon as possible.)