5.2 KiB
Installation
Note: Issues with distro bookworm - the required kernel modules cannot compile agains the latest 6.1.0 'bookworm' distribution. Current version was tested with bullseye 6.1.21-*. See details bellow.
Fresh SDCard preparation
-
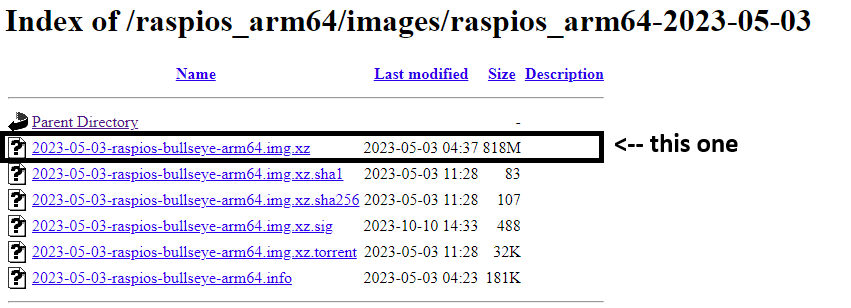
Download and install Raspberry Pi imager: https://downloads.raspberrypi.org/raspios_arm64/images/raspios_arm64-2023-05-03/

-
Insert a micro-SD card for flashing. Note - the process will override the SD's previous contents.
-
Download the latest bullseye distribution from: https://downloads.raspberrypi.org/raspios_arm64/images/raspios_arm64-2023-05-03/
-
Start Raspberry Pi Imager and choose device:
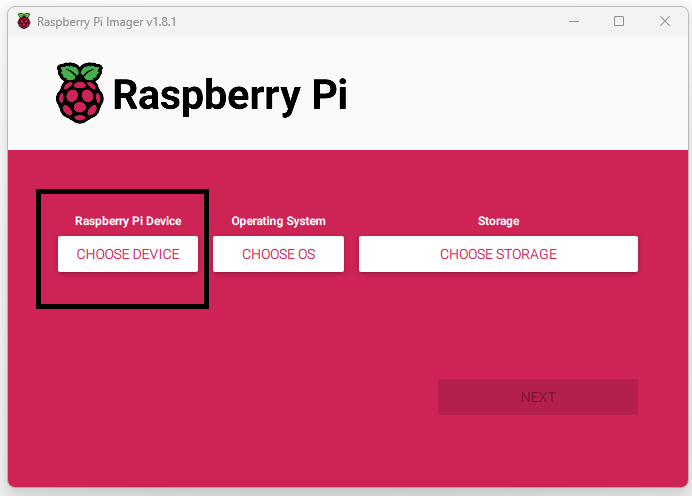 Note: Raspberry Pi 5 is not supported due to compatibility issues with the SMI communication.
 -
Choosing the OS file downloaded in step (3): Click the "CHOOSE OS" button and drag down to "Use Custom". Then select the downloaded file.
-
Select the target storage - be very careful to choose the micro-SD card that was inserted into the computer. In cases where various such devices are present in the system, verify the correct card by removing / re-inserting while monitoring the storage selection menu.
-
Edit additional settings of the system:
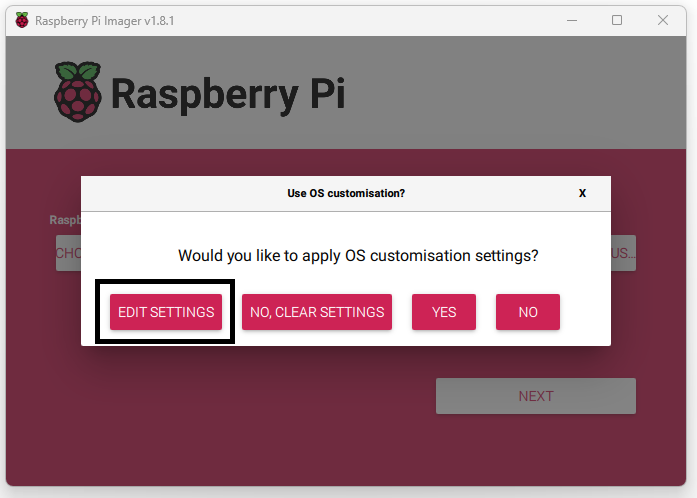
Make sure to enable ssh, apply a proper host name (default 'raspberrypi') and a username / password to further communicate with the RPI through Ethernet / Wifi. Wifi SSID can also be configured through this process to enable the RPI automatically connect the local Wifi Network. -
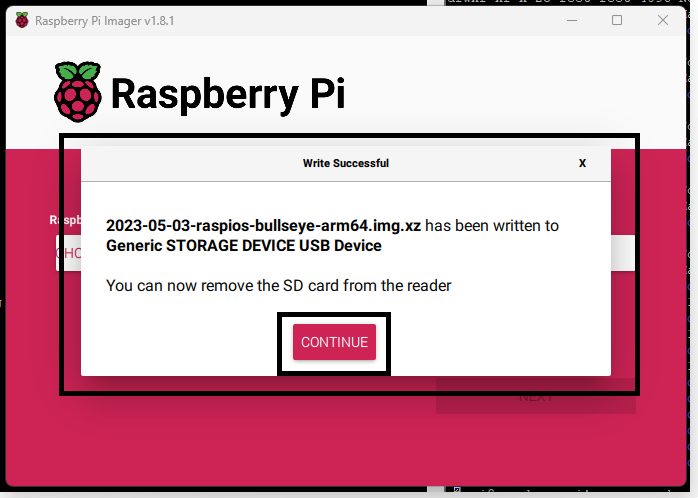
When the imager finished the process, remove the SDCard and insert into the Raspberry Pi.
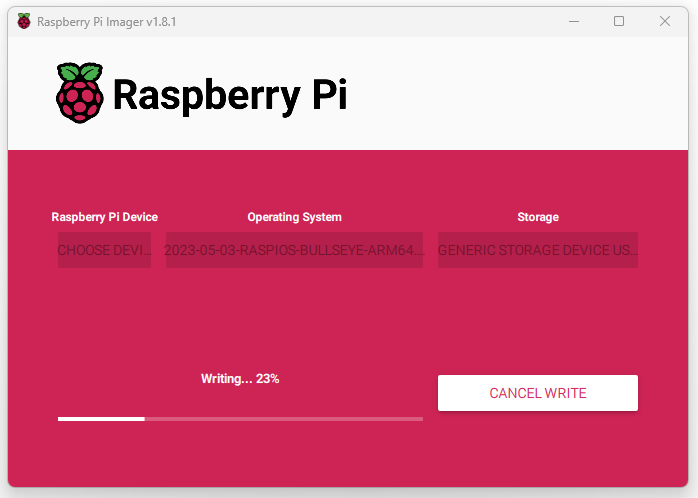 Note: do not remove the SDCard unless the images approits removel:
Software Installation and API invokation
The newly prepared SDCard can be inserted into the Raspberry Pi.
- Mount Cariboulite on top of the RPI device and power it on.
- Connecting the RPI is possible via direct Ethernet Cable, Wifi or by setting up a desktop environment with a display, keyboard and mouse.
- During a fresh distro configuration we recommand using the desktop environment. Ethernet connection also possible through ssh.
Connecting RPI through SSH
Installations
-
In the terminal (ssh), clone cariboulite repository:
git clone https://github.com/cariboulabs/cariboulite.gitand:git clone https://github.com/pothosware/SoapySDR.git -
Cmake installation and upgrade:
sudo apt updateif update is suggested by apt, use:
sudo apt upgradeand follow instructions.Now CMAKE is installed by:
sudo apt install cmake -
Install SoapySDR:
cd SoapySDR
mkdir build && cd build
cmake ../
make -j4
sudo make install
Soapy SDR is a third party generic SDR API that can interact with CaribouLite (in addition to the native c/c++ APIs)
-
Install the software using CaribouLite's dedicated install script:
cd ~/cariboulite # note: depends on the exact location that was chosen for the package. ./install.sh -
During this installation process, dependencies and kernel modules are being build and installed into the Linux system.
-
As the building process is finalized, the install script checks the
/boot/config.txtfile. Note: the exact location of the file varies between systems. In Raspbian this file shall typically be located in/boot/config.txt. The installer notes on any mismatch between the actual and expected configuration. The configuration should be applied to the config file according to instructions given by the script. -
As the building process finished, the APIs are installed into the system, including SoapySDR API, C and C++ API. The build artifacts will be located in the
buildsub-directory. -
After the installation process and the config.txt file editing are finished, reboot the system by:
sudo rebootand wait for the RPI to restart and initialize.
Testing and interactions
-
Testing the HAT connection and detection by running:
cat /proc/device-tree/hat/productshiould yield the following output:CaribouLite RPI Hat -
Testing the
smi_streamdriver insertion:lsmod | grep smishould produce the following output:smi_stream_dev 20480 0 bcm2835_smi 20480 1 smi_stream_dev -
Testing through the dedicated testing app: within the
buildsub-directory, run the following:./cariboulite_test_appThis application provides access to low / high level features of the board - board id,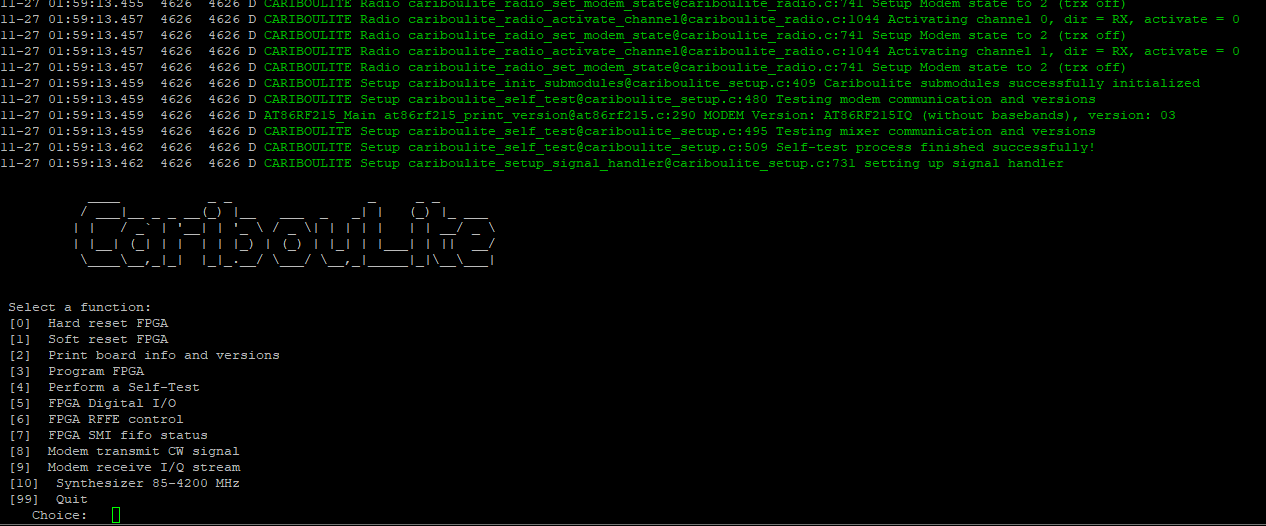
-
Testing the connection to the SoapySDR API. Use the following command to have the SoapySDR Util interract with the board and show it's information:
SoapySDRUtils --probeThe expected output shows the insterfacesm configurations and state of the board: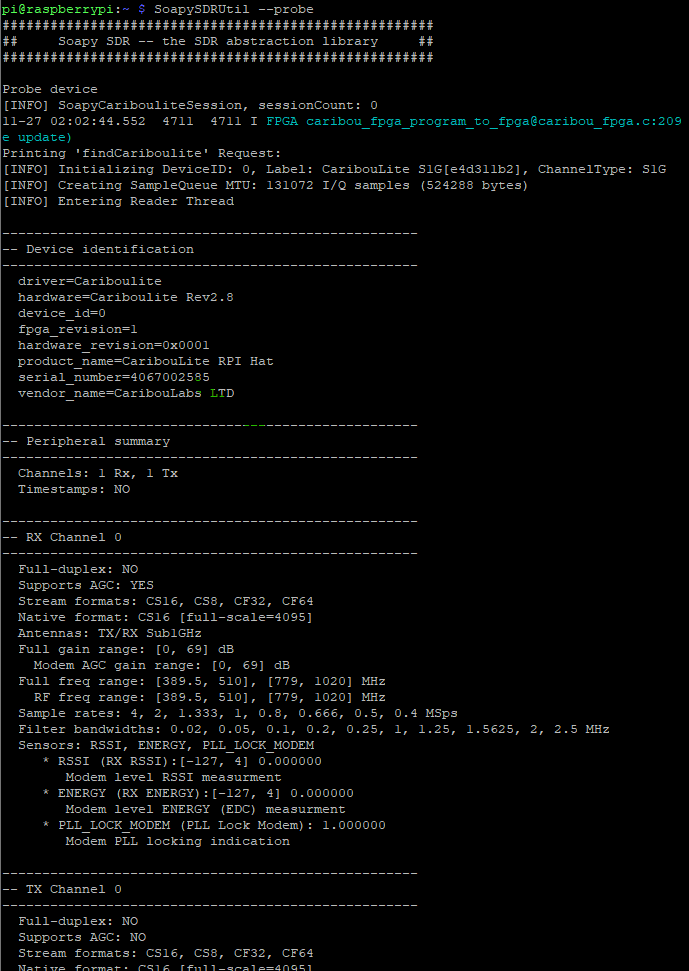
-
fdsfsd